Updated August 28, 2022.
What’s your favorite outdoor activity in your travels? For my husband Steve and me, it’s always hiking! We’ve hiked on snow-covered Alps, through actual jungles, and along Hawaiian ridges with views you’d never believe were real. Over the years we’ve learned a thing or two (sometimes by accident), and I’m here to pass along the best tips for having the best hike or your life!
*Some of the links below are Amazon affiliate links. When you click the links to shop with me, you’re supporting my small business at no additional cost to you!
Preparation
“If you fail to plan you are planning to fail.” —Benjamin Franklin
It’s true! And it can be dangerous not to do a little bit of preparation before a hike. But never fear! Just a few quick Google searches and you’ll be safely on your way in no time.

Keep reading: How to Snow Hike in the Swiss Alps
Tip #1: Train for your hike.
It’s inevitable that you’ll be sore after a hike, but you don’t have to be truly in pain if you do a little training beforehand! Two to three weeks before your hike (or your vacation where you’ll be hiking), start taking the stairs more often, start going to a walk if you don’t get a lot of steps in on a regular day, and if you’re a running, do some trail running or some hill-repeats a day or two a week in place of a regular run. All this will activate muscles you don’t normally use in daily life but that you will use on your hike.
Some other fun ways to train include:
- Using the treadclimber at the gym. This combines the motions of a treadmill, stair climber, and elliptical, and it’s the closest thing to hiking that you can do indoors!
- Run the stairs. I do a workout on the stairs a day or two a week where I run up six flights of stairs in a parking garage close to my gym. Change it up and keep it interesting by running up one flight and back down, two flights and back down, three flights and back down, etc. You’ll be amazed at how many calories you can burn with a set of stairs!
- Take some nearby hikes. The best way to train for a hike is to hike an easier trail and work up to more difficult trails from there!

Koko Head Crater, O’ahu, Hawaii
Get more training tips on my Health and Wellness Page!
Tip #2: Know your route.
Most trails have names, especially popular routes you want to take on your travels. Just do a quick Google search of the name of the trail and find out a few things.
- How long is it?
- How long should it take to hike it?
- What’s the difficulty level?
- When is the best time of day (to avoid people, get the best views, before it gets too hot, etc.)?
- What’s the bathroom situation?
In your searches you will inevitably come across AllTrails.com, which is a fabulous resource! But go a little further and read blogs about hiking the trails you want. Bloggers tend to give more in-depth information, which will give you extra tips, photos, and information you might not know to search for otherwise.

Keep reading: Hiking Hawaii: Maui
Tip #3: Know the rules.
In your Googling, you should also look specifically for the three R’s: rules, restrictions, and regulations! Some hikes might be on private property, others might only be accessible at certain times of day or certain seasons, and still others might be on park land or a special reserve, so you have to be careful about what you take in and out (including soil!).
For instance, a popular hike on O’ahu is in a gated community, and you have to have a special pass to get in. Uetilberg Mountain in Switzerland is a wonderful hike, but it’s far enough outside the Zurich city center that you need to take a tram there. The hike through Kata Tjuta near Uluru in Australia is so hot in the summer months that they close it down entirely! Know the rules before you go!

Related: Tips for Visiting the Australian Outback
Practicalities
I know, I know, “practical” is the opposite of “fun,” but trust me, you’ll have more fun if you take care of the practical stuff first!
Tip #4: Wear sunscreen (and maybe bring extra).
Even in the winter time, even if it’s overcast, wear some sunscreen on your exposed skin. Whether that’s just your face or your arms and legs, too, you’ll be much more comfortable after your hike if you apply sunscreen before! Pro tip: bring extra in your day pack, especially on a long hike, so you can reapply as needed. I recommend Neutrogena’s solid zinc sunscreen because it is reef safe, which is especially important if you’re hiking on an island… the water you swim in on your hike and the water from your shower afterward all go into the ocean, even if you don’t!
More here: What to Pack for Summer Travels
Tip #5: Wear bug repellent (and maybe bring extra).
Just like sunscreen, applying bug repellent before will make sure you’re not itching later! Just a little bit around your ankles, behind your knees, on your forearms, and on the back of your neck is enough to keep you protected in most cases.
I always make sure mine contains DEET for maximum protection. You don’t want to take your chances with dengue fever, malaria, Lyme disease, zika, yellow fever, etc. Typically I prefer natural over chemical solutions, but bug repellent is an exception I don’t think twice about making. Here is a natural option, and a DEET option. Choose which one is best for your preferences!
Related: The Ultimate Guide to SOLID Toiletries!
Tip #6: Bring more snacks than you think you need.
I don’t mean to bring a buffet, but instead of just a PB&J, bring along an apple or banana, too. Instead of stopping with a protein bar, bring trail mix, too. My husband Steve and I like to pack cheese sandwiches on high-fiber bread for staying power, plus some fruit. Other hiking favorites include beef jerky (or bison, or turkey, or whatever sounds interesting!), dried fruit, and nuts! Here are links to some of our preferred snack brands:
More here: The Best Snacks for Your Long Flights
Tip #7: Bring more water than you think you’ll need.
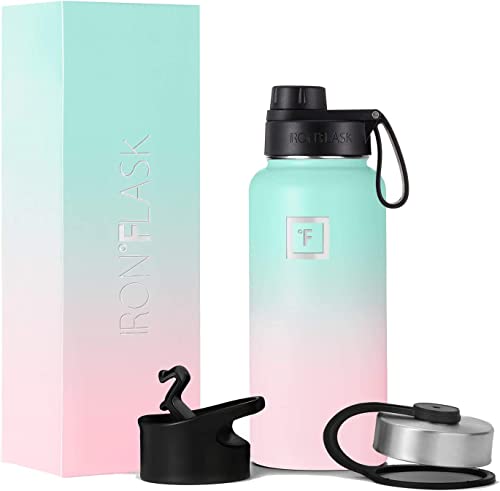
Unless you’re packing five or six of them, leave the squatty 6-ounce water bottle behind! Fill up a reusable 32-ounce bottle at a minimum, and if you’ll be hiking more than a couple of hours, bring along another 16- or 20-ounce bottle of water as well. Sugary drinks are fine for a boost of energy and a shot of hydration, but they will leave you more thirsty in the long run. Bring regular old water, too!
I LOVE that this one comes with three lid options!
And a collapsible bottle is always a good idea for travel.
More here: The Top 10 Packing Hacks
Gear
If you’re taking a 90-liter backpack for a 2-hour hike, you’re bringing too much. But you will definitely want a good day pack to keep your snacks, water, sunscreen, and bug repellent at hand!
Tip #8: Use a comfortable day pack.
I recommend a backpack so the weight is as evenly distributed as possible. Leave the cross-body bag at home. Your back will thank you! Be sure to fill it up and wear it around a bit before you take it for your epic hiking event so you know how it feels. Fill it up and wear it while you train!

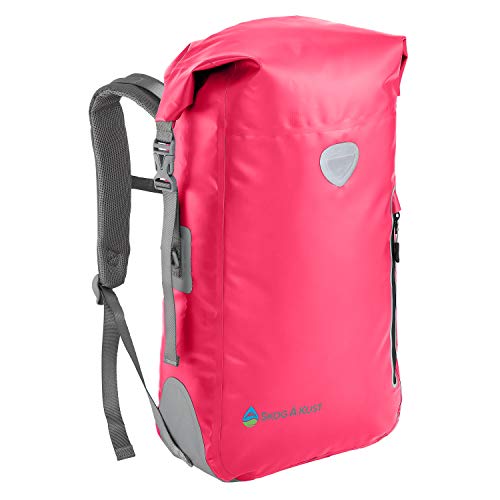
Need a solid day pack? Check out these options from a couple of my favorite brands! The Venture Pal is packable, making it perfect for traveling, and the Skog a Kust pack is waterproof and floats in the water, making it ideal for hikes to waterfalls, swimming holes, or little-known beaches!
More here: How to Pack the Perfect Carry-on
Tip #9: Wear appropriate shoes.
Notice I didn’t say “wear hiking shoes.” That’s because hiking shoes are not appropriate for all hikes. Most of the time, a pair of running shoes will do because they tend to have a lot of tread to grip the road, or in this case, the trail. For more rugged hikes, get a solid pair of actual hiking shoes. But always, ALWAYS wear your shoes around the house (and train in them!) before a trip or a long hike. You don’t want to be wearing them in on a three-hour hike and end up with blood blisters before you’re even half way through!
Must read next: The Ultimate Guide to Travel and Your Feet
Tip #10: Wear a hat.
If I had to choose between sunglasses or a hat, I would choose the hat every time! Sunglasses only shield your eye area, whereas a hat will shield your eyes and your face, which needs just as much protection. Of course, sunglasses AND a hat is the ideal situation!

Read next: The Best Hikes in the Hawaiian Islands
Down and Dirty
Because let’s face it, you shower after a hike for a reason!
Tip #11: For muddy hikes, wear shoes that you don’t mind throwing away.
This is especially important if you’re hiking in a different country or a particularly muddy place. Taking dirt with you from place to place can actually be very damaging for some ecosystems, particularly islands. Even within the island of Molokai, Hawaii, hikers have to clean off their shoes both before and after hiking some trails! But also, taking muddy or wet shoes home with you either in your luggage or on a long flight is not always practical! Wear shoes that won’t break your heart if you have to leave them behind.

Want more about Guam? Check out my Pacific Islands Page!
Tip #12: Bring a towel.
I don’t know about you, but I’m not a fan of rental car cleaning fees! So avoid extra fees on your trip by simply putting a towel on your seat before you get in the rental car. You might also want to wipe yourself down with one after your hike, as well. We have always been glad when we remembered to bring a towel with us. Here’s a great option that comes with three quick-dry towels!
Tip #13: Bring a change of clothes.
Sometimes wiping down with a towel just doesn’t cut it. And sometimes you want to swim on a waterfall hike, and walking back in a wet bathing suit and wet clothes is incredibly uncomfortable! So just bring a quick change if you think you might need it.

Get all the best packing tips on my Packing Page!
Think you’re ready to take on the hike of your life? Comment below to let me know!
And for more essential travel tips, check out my dedicated Travel Tips Page!
Love this post? Pin it for later!


Leave a Reply